The Macbook Pro on hand was purchased in 2010 and has been used normally so far. The opportunity to upgrade the memory is to upgrade and expand the SSD memory in the cluster of computers on hand, and it takes more than one year to use a solid state disk, thinking of simply upgrading the memory of the laptop. The upgrade is to upgrade the main storage hard disk to a solid state hard disk. The replaced hard disk is installed in the optical drive, and the removed optical drive is converted into an external optical drive. Tall is taught as "hybrid storage." This kind of reform process is based on the experience of “what it is worth to buy†from other friends. Based on this, it will add questions to individuals when they are actually operating, and hopes to help a friend in need.
The second part of this article responds to the plan of the public report and shares with you the preliminary process of installing the X1 Tablet Ubuntu. The test report is as follows:
1. Macbook Pro memory upgrade replacement process:
Preparation: Backup and Format SSD
Before the replacement, a removable hard disk is required to save the backup data of the time machine. About data backup, Apple's own time machine is very good, and the interface is very logical. You can switch between different backup versions, and each backup only saves content that is different from the last backup. This has the benefit of greatly reducing storage requirements and reducing backup time.
There are many ways to format the SSD. Since I don't have a sata to usb cable, I format the SSD to use an SSD to replace the bootable drive.
Disassemble start:
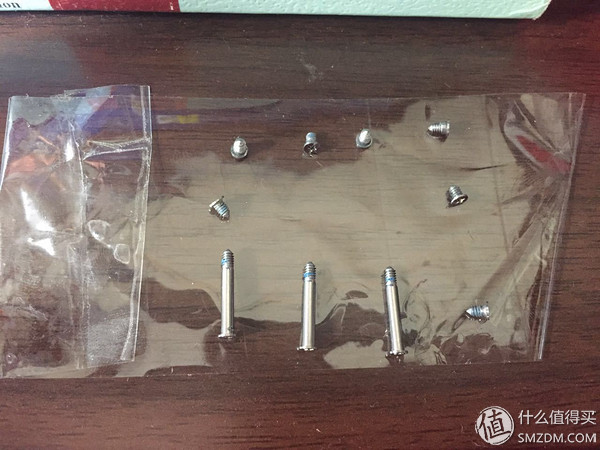
Different from drawing the position of the screw, my solution is to use transparent glue. The advantage is that it is easy and easy to lose. The following figure shows the screws on the D surface.
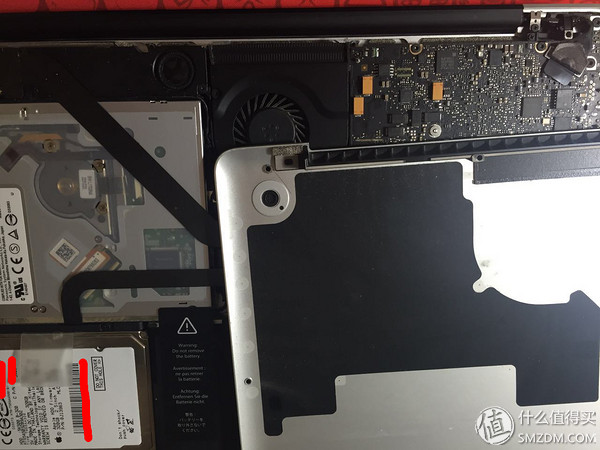
The following figure is the way to remove the D surface. There are three main upgrade steps: 1. Replace the optical drive with the existing one; 2. Replace the replaced optical drive with an external optical drive; 3. Install the new SSD hard drive on the original drive. The upgraded system structure: SSD is the main boot disk, which is used to store the operating system and related software. The disk is the main storage disk and is used to store multimedia files and other personal data. The optical drive is external. Expected results: 1. The operating system startup time is shortened; 2. The system enters the sleep state; the time is shortened; 3. The computer is unable to hear the “head†sound of the head protection; 4. The computer is unable to hear the self-test sound of the drive.
The first stage: remove the drive.
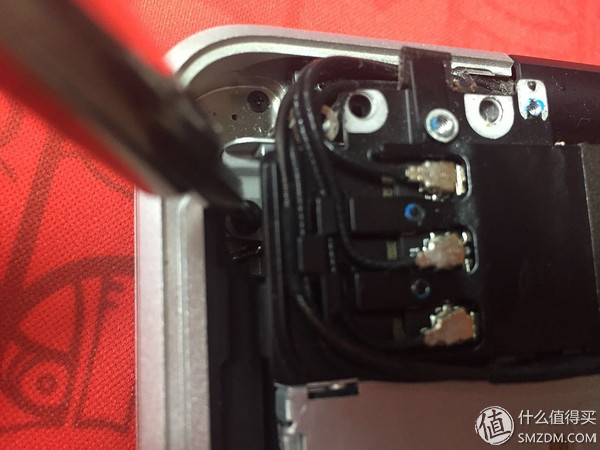
The first step is to disconnect the cables carefully, as shown in the figure below for the four connectors (three short distances, the fourth smaller, at the lower right of the picture), corresponding to the monitor, optical drive, hard disk, and battery connections. Because the connector is not large, it is not recommended to pull it by hand to avoid damaging the connector. I use a disassembled hard plastic tool.

Next is to release the screw. The figure below shows the screws that release the fixed optical drive. The position is low. See the tip of the screwdriver and do not remove it.
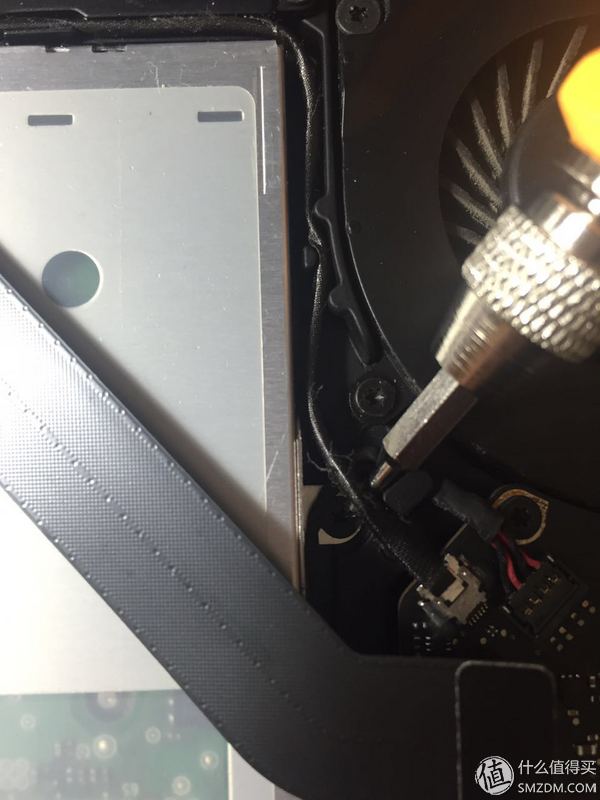
The next step is to release the second fixing screw of the optical drive, located near the side of the housing, as shown in the figure below. Location reference: The drive is above, and the hard drive is below.

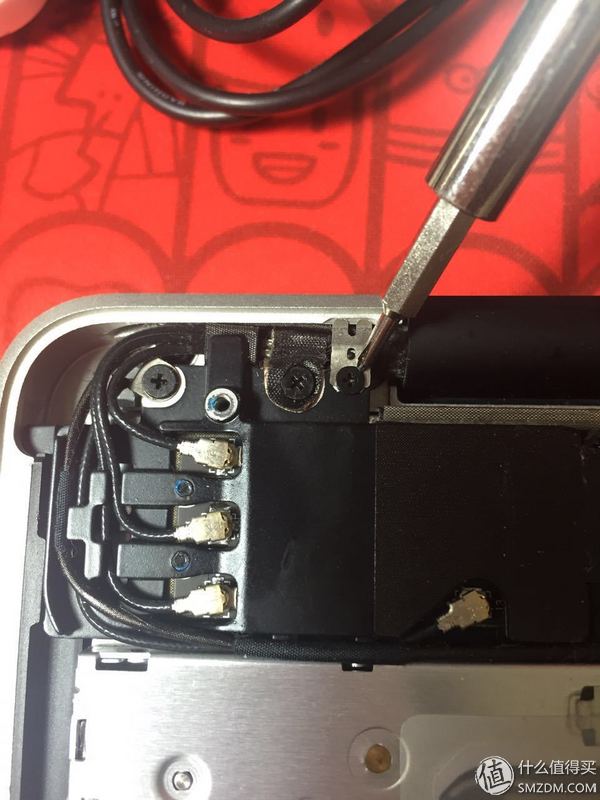
The third fixing screw of the optical drive is located under the speaker at the hinge and you need to lift the speaker first. Therefore, the corresponding four screws need to be released (positions are as shown in the figure below)
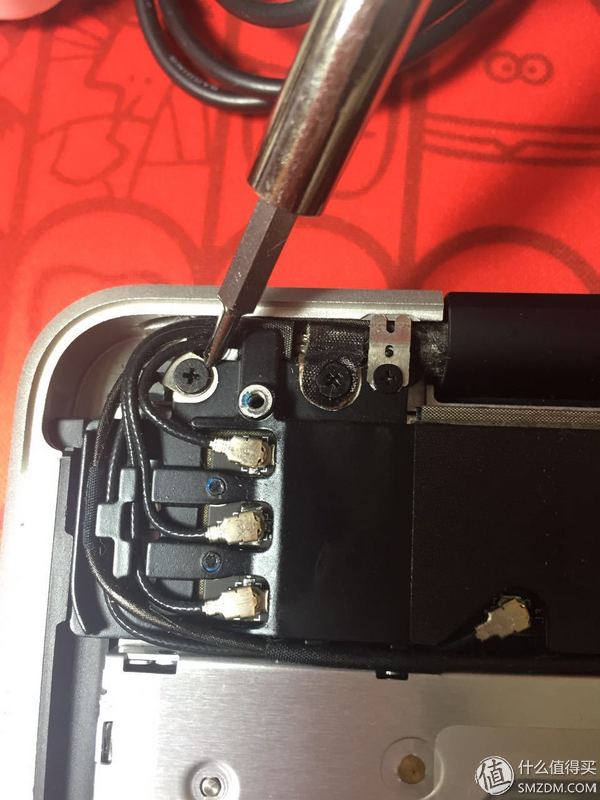
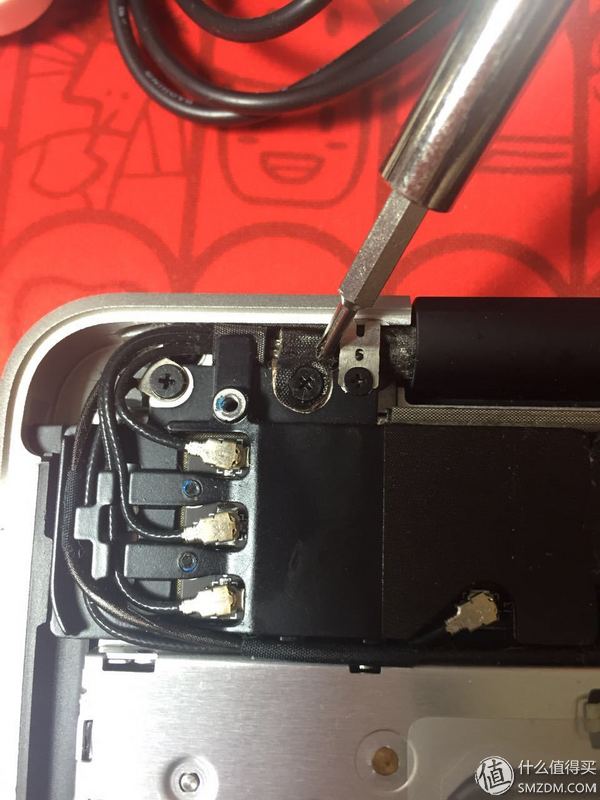
A special note is the third screw (below), which holds a small piece of metal and needs to be carefully stored and remembered for its mounting position. The advantage of taking apart and taking pictures is that each step has photos to trace.
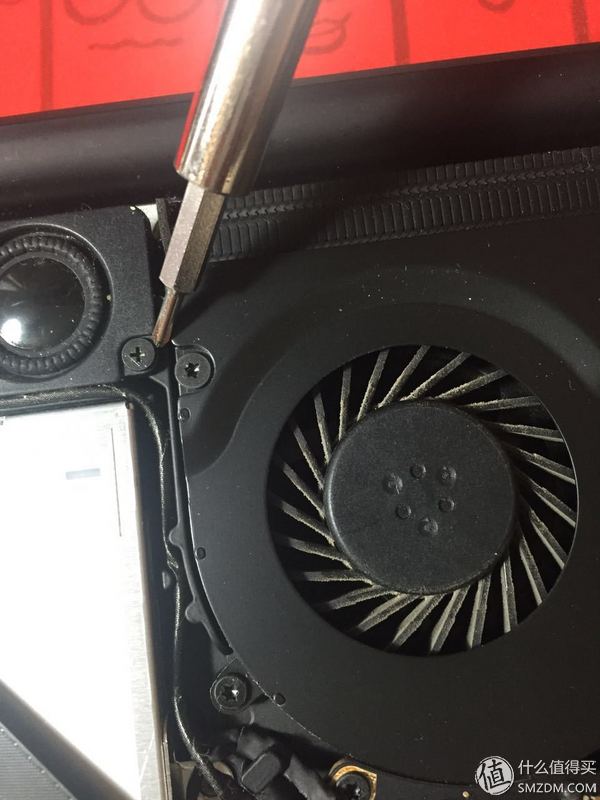
The fourth screw is located on the other side of the speaker, and it should not be disassembled into a fan. After six years of use, the degree of fan dustiness appears to be acceptable.
The next step is to lift the speaker carefully, and then release the third screw that holds the optical drive below (bottom). Then carefully pull out the drive.
This is the removed drive.
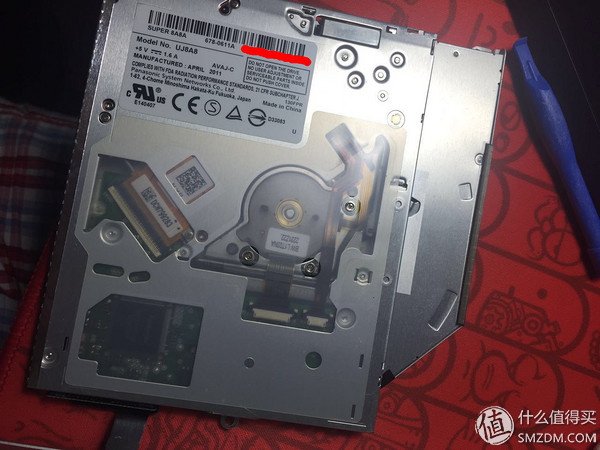
There are two kinds of parts on the optical drive that need to be removed. One is the data line and the other is a fixed piece (see the next two figures).
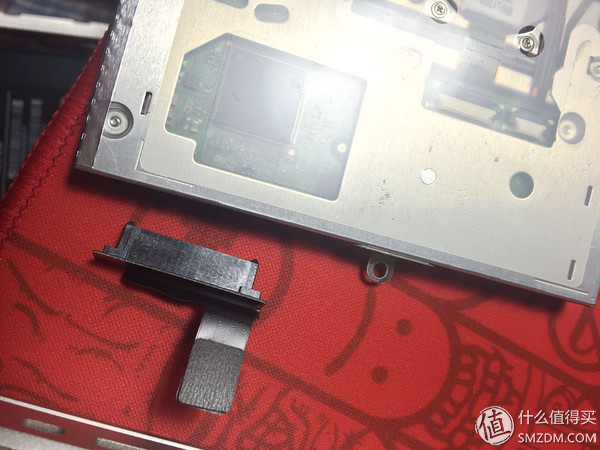
There is a difference between the positive and negative of the fixed piece, do not install the opposite, pay attention to the location of the fixing hole.
The removed optical drive is loaded into the external optical drive box as follows. Optical drive cartridges are sold on Taobao, all plastic, and workmanship is common, but it looks like there is no better choice.

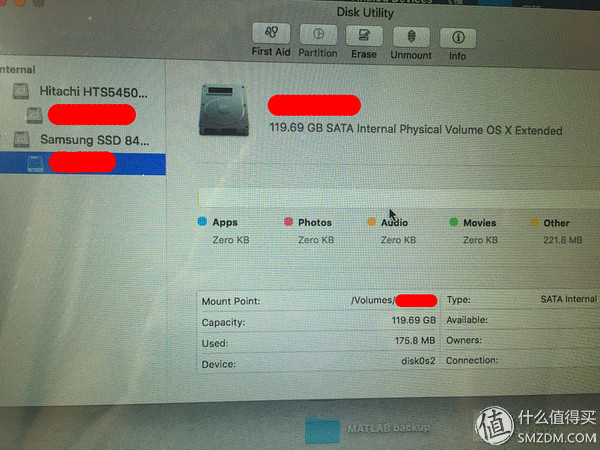
In the second stage, install the SSD and remove the disk. Before this, you must first format the SSD. This process requires connecting the SSD to the mainboard and entering the system settings. Another purpose of this step is to ensure that the SSD can be recognized by the computer. This step is to ensure safety. It is better to take a little time to replace the D side and try not to streaking. . .
After the SSD has been formatted correctly, shut down and remove the hard disk. Four corners of the hard disk have four feet. This is a custom design of Apple. The hard disk is fixed with four feet and shock-absorbing rubber, and is suspended in the chassis to reduce physical vibrations through shock-absorbing rubber. The four legs need to be removed and installed on the SSD (figure 2 below), where the Phillips screwdriver head needs to be replaced.

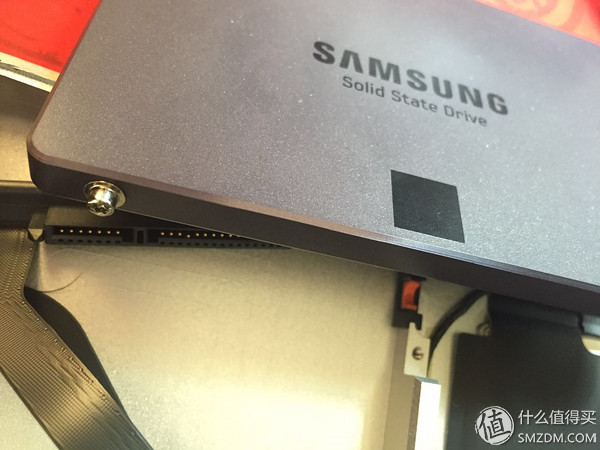
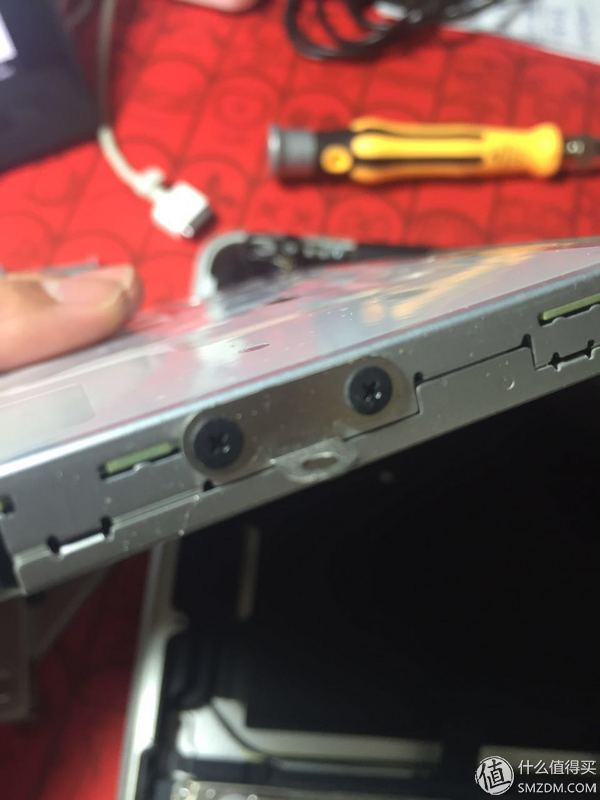
The next step is to replace the SSD with the main hard disk. The following figure shows the plastic rod that holds the SSD. The rod is fixed by two screws (see the following two figures). The other side of the rod is the shock-absorbing rubber.
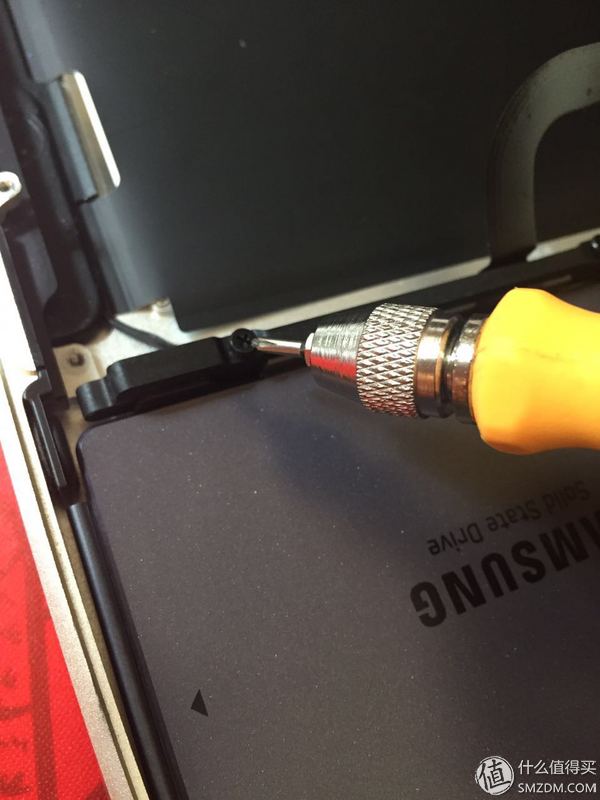
The figure below shows the third screw fixing the hard disk
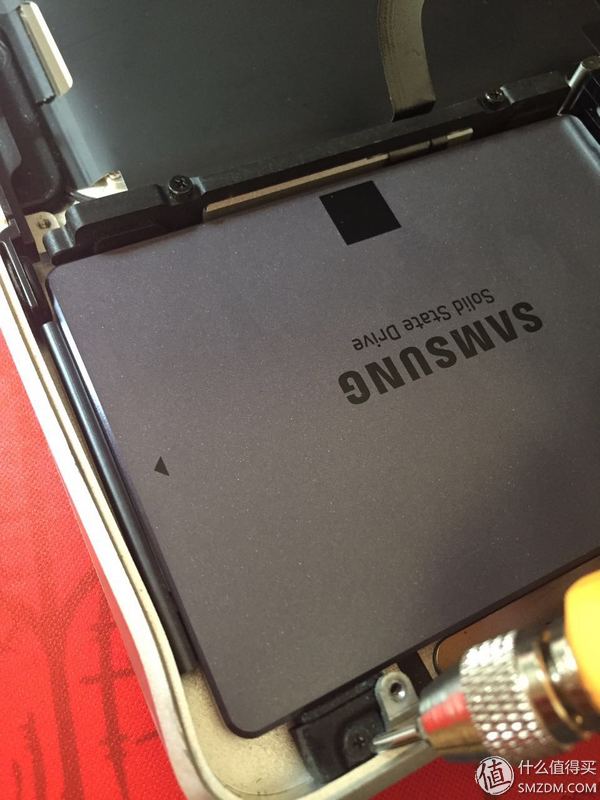
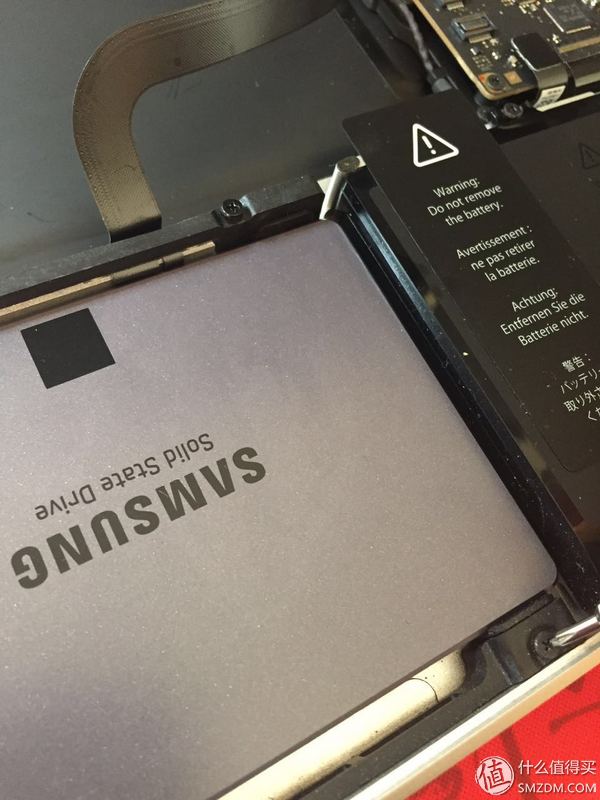
Replaced by the disk under the bracket back to the drive position, the disk bracket sold on Taobao, and the drive box is the same store sales. The bracket is a metal material and it is relatively safe. The bracket also comes with a white sticker that can be affixed to the back of the disk and is used to block the pins and looks fresh. The following figure is what it looks like after installation. Next, replace the data cable and battery cable. Take care not to crush the motherboard.

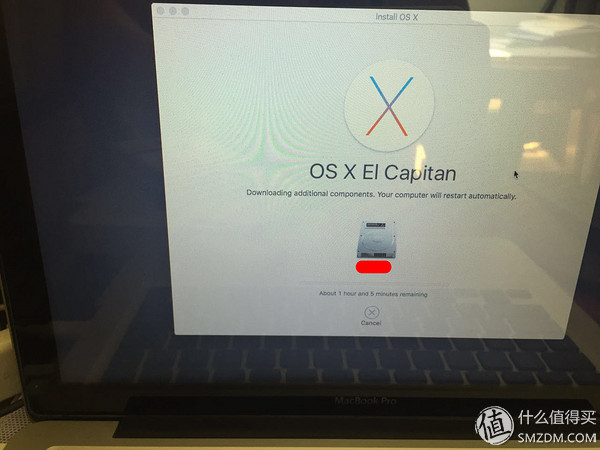
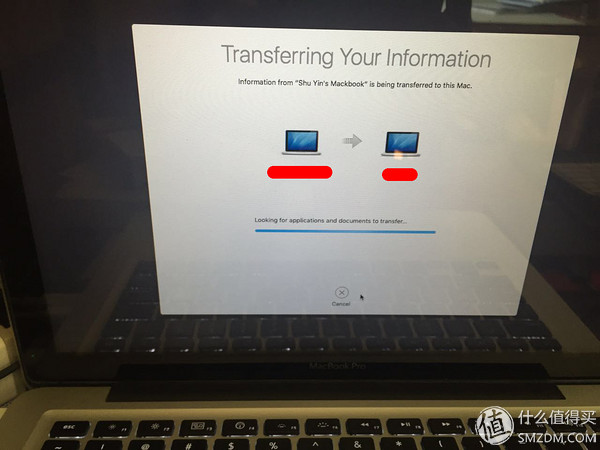
The third stage, data recovery. This step requires the use of a time machine. However, due to the limited capacity of the SSD used, the data of the original disk cannot be loaded, so the time machine recovery system initially indicates that the capacity is insufficient. The second is to download the os x el capitan installation software via the apple store and reinstall it, and then restore the user settings and Application through the time machine. The rest of the data is moving to disk. The only problem is that the initial path of os x for various multimedia data and user data is on the SSD (same disk as the operating system), and you do not want to set FusionDrivem, so the solution is to use the shortcut form to locate Desktop, Movies, Pictures, etc. The path is linked to the disk. Mainly through the ln command to create a soft link to the SSD folder on the disk.
Tossing experience: The whole process is not complicated, and there are online tutorials. It is only in the process that some of the tutorials are not clearly shown, so it is decided to make a detailed description. After the upgrade, the computer's startup speed is really much faster. The downside is that due to the small size of the SSD, photos and similar data are not suitable for SSDs. Fortunately, there are disks as secondary storage. This point also shows that when replacing the macbook, the storage capacity cannot be chosen too small. Otherwise, it may be necessary to exchange data between the main storage SSD and the external hard disk frequently, which reduces the response performance of the system.
Attach a link to the hard disk bracket and optical drive cartridge
2. X1 Tablet Install Ubuntu
About the X1 Tablet, the distance was nearly four months. At present, it is used as an auxiliary laptop (for example, when sending loved ones to learn musical instruments and then move to a nearby coffee shop to work), Onenote and Latex are the most used ones. Have to say, for the light office, X1 Tablet is still very convenient, especially the weight. But the smaller screen size plus the high-resolution discomfort is also very obvious - the font is too small, my solution is to enlarge the whole to 150%. Another problem is that the screen is low, permanently uncomfortable, the solution is The earplug protection box is placed under the shaft and there is no place to place it.
After a few months of continuous use, the X1 Tablet has a deeper understanding of its habits. For such products, if the experience time can be longer, the report may be more able to reflect the actual use. With regard to the public report, there are things that are unpleasant. The reading of my report is not high. This is related to the viewpoint, writing style, title, etc. This I can understand. After all, the current web title needs to be personal, eye-catching, and focused. Don't look at it if you don't look at it, but some people report that they didn't read it but complained that the article was too long to be viewed in the commentary area. This behavior is difficult for me to understand. What is the purpose? Does the author still have a sense of existence? The question is whether you see or don't look. Who gives a shit? To put it bluntly, does such a person have a sense of being absent in the actual life and need to brush up in this way? This is not the same as the one that said first in Weibo.
Another problem is the phenomenon of reading unnecessary words. It seems to be very common at present. I admit that due to the fast-paced social state and the uneven level of individual writing, the time and experience of reading a word are not as direct and exciting as reading, but I personally prefer to read text. This is very important for training one's communication ability and abstract thinking ability as well as logical ability. After all, the text needs to explain the cause and effect with a clear statement at a level, and the picture does not need to be.
As mentioned in the test, I tried to install Ubuntu on the X1 Tablet. Let's briefly share the process below.
Install Ubuntu
Thanks to Ubuntu's graphical interface, the whole process is not complicated. It should be noted that the X1 Tablet can be connected to a U disk or a removable hard disk for Ubuntu installation via a USB interface, but it cannot be installed via a microSD card. The microSD card interface is not an option when selecting a startup item. Taking into account the properties of the X1 Tablet tablet, the way to enter Bios is no longer mad pressing F8, but after starting the computer, click on the screen or press the Enter key on the keyboard when you see the LENOVO logo.
I completed the installation through a USB3.0 USB interface. The installation time of the entire Ubuntu is relatively short. This is due to the I/O performance of the SSD and the high throughput performance of USB3.0. The reading and writing of data is faster. It is worth mentioning that Ubuntu native has support for touch screen devices, but the native support of virtual keyboards is not particularly good. The height of the virtual keyboard is too narrow, resulting in small buttons that are not easy to use. Need to find third-party solutions.
The way to set the screen keyboard is:
System settings - universal access - typing - on screen keyboard
Some settings of the keyboard enter the four small square icons on the status bar on the screen. Since the native support of the screen keyboard is implemented as an auxiliary function, the actual use experience is not as good as that of a keyboard designed for a tablet computer. Can only say that it is better than nothing.
In fact, the X1 Tablet's experience as a tablet running under Ubuntu is not particularly good, especially for people who are accustomed to using terminal. Another place that is more embarrassing is that after installing the Windows+Ubuntu dual system, GRUB does not support the virtual keyboard to select startup items when it is turned on. If Ubuntu is set to the first boot sequence, there is no keyboard, so basically do not want to enter Windows now. What is more embarrassing is that Lenovo uses Windows 10 to give the X1 Tablet a 30-day standby feature that allows the X1 Tablet to go into a deep sleep state after waiting for a period of time. When the computer wakes up through power, it will enter the GRUB selection page. With the keyboard, you can only watch the X1 Tablet enter the Ubuntu interface.
My solution is to modify the GRUB boot sequence, set Windows 10 to the first boot sequence, and increase the select wait time from the default value to 30s, which is sometimes indirectly on the keyboard. Or the worst case is to restart the computer once you have connected the keyboard.
The following are some of the logs tossing after installing Ubuntu. Due to personal status issues, this issue has not been continued in the near future. Wait a few days and continue to toss:
Problems:
The X1 Tablet cannot be used from the keyboard under Ubuntu. Especially when duo boot, which operating system cannot be selected via the virtual keyboard
Touch screen native does not support screen slide up and down, only the text selection function
Tuchpad can't use two-finger scrolling, edge operations
Trackpoint cannot be used natively, and the red dot cannot be used
No problem with stylus hardware recognition, but no native software support stylus
Fingerprint scanning can not be used natively
FnLk cannot be used
Currently only solves the problem of trackpoint usage:
Run xinput to see the specific type of input device
Run sudo dmidecode -t 21 to see the system recognition status of the external keyboard trackpoint and touchpad
After confirming, add kernel parameters in GRUB
Run sudo vim /etc/default/grub to open the grub file
Find the line of code that starts with "GRUB_CMDLINE_LINUX_DEFAULT". After "=" add the following "quiet splash usbhid.quirks=0x17ef:0x6085:0x40" , note that the quotation marks need to be added together, and there is a space between quiet and splash. Save and close the edit box after the addition is complete.
Run sudo update-grub to update grub
Restart the system
At present, the trackpoint cannot be used normally. So now the X1 Tablet uses Ubuntu or uses an external keyboard, mouse, and monitor. Although inconvenient, it does not affect the use. If there is time and energy in the later period, we will continue to look for solutions.
The content of the second part expressed some of my own opinions, but I was not worried about being sprayed because so many boring words were enough to reject the inertial spray.